A Picture Listing the Different Parts of a Computer
- Download the source files for this tutorial
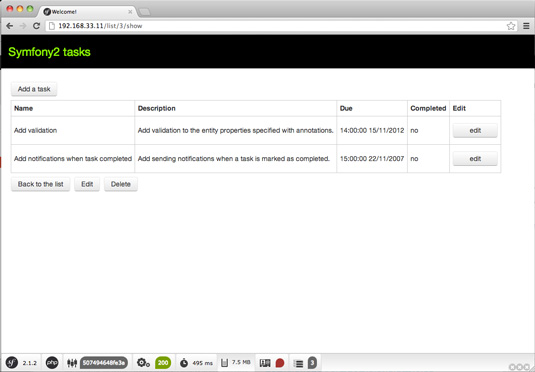
In part one of this tutorial we made a task list site to manage task lists as well as the add, edit and delete tasks in these lists. In this part we will add some additional functionality to our application.
We'll start with a simple change on marking the task as complete by setting a completion date. Add a new field and mapping annotation to the list of properties in the Task entity (src/DotNet/TaskListBundle/Entity/Task.php) to store the completion date:
/** @ORM\Column(type="datetime", nullable=true) */ private $dateCompleted; At the command line, run the following console command from the root directory of the application to generate getter and setter methods:
php app/console doctrine:generate:entities DotNetTaskListBundle:Task We could just add this functionality to the updateAction of the TaskController. However, it would be preferable to keep our controllers as thin as possible. Do this in the entity using the Doctrine lifecycle events, which get fired at various points in the process of persisting an entity. These ensure the business rules are always run however the update to the entity is triggered.
To update this on completion we use the PreUpdate event, fired when an already persisted entity has been updated before the changes are sent to the database. In the Task entity class, add the following method and annotation:
/** @ORM\PreUpdate */ public function updateDateCompleted() { if ($this->completed) { $this->dateCompleted = new \DateTime(); } } The annotation tells Doctrine that this method should be run when the PreUpdate event occurs. The Doctrine also needs telling that the entity has one of these lifecycle callbacks by adding a further annotation to the class level annotations (in other words, below @ORM\Entity):
@ORM\HasLifecycleCallbacks() Stop the task being edited once completed as well as displaying the completed date in the template. In src/DotNet/TaskListBundle/Resources/ views/TaskList/show.html.twig change the line showing the completed cell in the table to:
<td>{% if task . completed % }{{t ask .date Completed|date ('H:i:s d/m/Y') }}{% else %}no{% endif %}</td> Change the line below that shows the edit link to:
<td>{% if not task.completed %}{<a href="{{ path ('task _edit', { 'id': task.id }) }}">edit</a>{% endif %}</td> 
This will only get rid of the link though; we really need to stop the edit form page being displayed if you navigate to it directly by entering its URL in the browser's address bar.
In the TaskController (src/DotNet/TaskListBundle/Controller/ TaskController.php) for the editAction and updateAction methods, there is a lready a check that the entity exists. We can add to this to make sure that the task is not already completed:
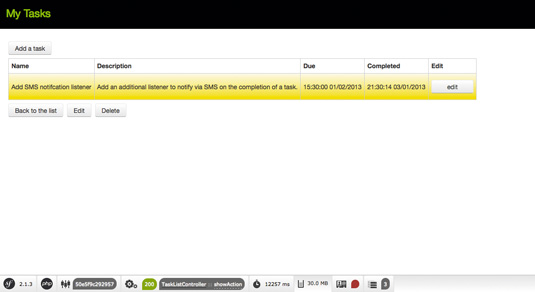
if (!$entity || $entity->getCompleted()) { throw $this->createNotFoundException('Unable to find Task entity.'); } Now open the app in your browser, add a task and mark it complete. You'll see the current date is shown in the completed column.
As well as marking the task complete we want to send an email notification out when the task is completed. To do this, use two of the features of Symfony2 that help you to build flexible and powerful applications: namely, the service container and the event dispatcher.
The service container manages the creation of objects so you can compose complicated objects that have multiple dependencies without having to write the code to do this whenever you want to use them. We will create our class for sending the email notification as a service and combine it with the services it uses itself to produce and send the email.
The event dispatcher allows you to decouple the code. We'll use it to prevent tying the sending of the email into our controller and see how we could easily add or remove the other things that happen when the Task is updated. This is similar to the Doctrine event used to add the completion date. However, this time we will raise the event ourselves.
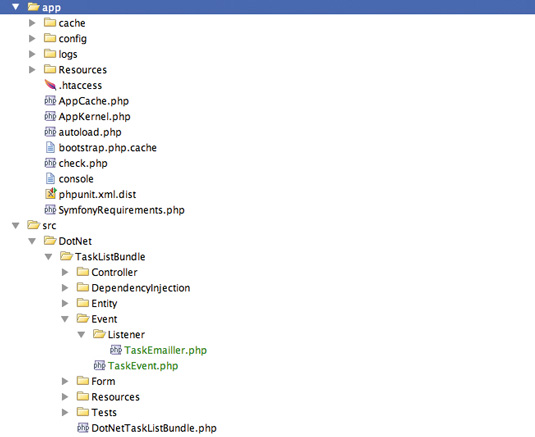
Create an event class to hold the Task so we have access to it in the listener. Add an Event directory to the TaskListBundle. Inside, create a TaskEvent.php file with the following code in it:
<?php namespace DotNet\TaskListBundle\Event; use Symfony\Component\EventDispatcher\Event; class TaskEvent extends Event { protected $task; public function __construct($entity) { $this->task = $entity; } public function getTask() { return $this->task; } } Now add dispatching the event to the TaskController. Add a use statement to the others at the top of the file and import the event we just created:
use DotNet\TaskListBundle\Event\TaskEvent; Then, in the updateAction after the entity manager is flushed
($em->flush();), add this line:
$this->get('event_dispatcher')->dispatch('task.updated', new TaskEvent($entity)); This uses the event dispatcher service to dispatch an instance of our event with the Task object in it. The first argument is the name of the event, which can be any string you want – the Symfony2 convention is to use dots as separators in the event names. You should now be able to run the application again.
The event will be fired if you update a Task. Events that are fired are shown in the profiler. But, as we redirect the browser to a different page after firing the event, it's not visible. We can configure the redirects to be intercepted so we get a chance to see the profiler before the redirection takes place. In app/config/config_dev.yml you will see a line under the web_ profiler section; change it to:
intercept_redirects: true This config change will only affect the dev environment. You wouldn't see redirects being interrupted if you deploy the app in the production environment, which is done by using the app.php front controller instead of app_dev.php.
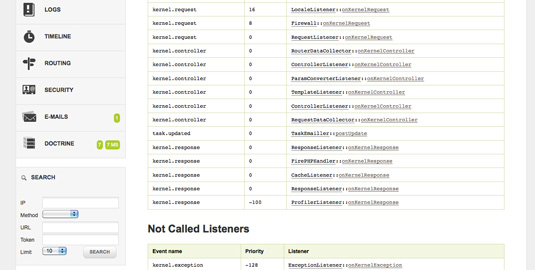
You'll now be able to see the event was fired. You'll also be able to see several events internal to the framework in the profiler by opening it from the toolbar at the bottom of the page and viewing the events section.
At the moment, nothing different happens as nothing is listening for the event. Create a Listener directory inside the Event directory you created before and add a TaskEmailler.php file to it with the following in it:
<?php namespace DotNet\TaskListBundle\Event\Listener; use DotNet\TaskListBundle\Event\TaskEvent; class TaskEmailler { protected $mailer; protected $templating; protected $emailFrom; protected $emailTo; public function __construct(TYPE HINT HERE? $mailer, $templating, $emailFrom, $emailTo) { $this->mailer = $mailer; $this->templating = $templating; $this->emailFrom = $emailFrom; $this->emailTo = $emailTo; } } Here we're just adding our class's dependencies via its constructor. Use the mailer service to send the email and the templating service to render the Twig template for the email body. By passing them in this way we don't have to worry about how the mailer and templating engine are created or configured; we can instead concentrate on how to use them.

The email address we want to send the notification to, and the email address it's from, is also passed in. These are simple strings rather than objects. This way we can avoid hard coding them in our class. You'll see how these services and parameters get into the objects instantiated from our class when we configure it as a service. First, add a method to send the email:
public function postUpdate(TaskEvent $args) { $task = $args->getTask(); if (!$task->getCompleted()) { return; } $message = \Swift_Message::newInstance() ->setSubject('Task completed') ->setFrom($this->emailFrom) ->setTo($this->emailTo) ->setBody($this->templating->render( 'DotNetTaskListBundle:Task:email.txt.twig', array('task' => $task)) ); $this->mailer->send($message); } So, if the task is set to completed we create an new email object, set its subject and set the to and from addresses using the parameters passed in. Use the template service to render a template to create the email body. Once it's created, pass it to the mailer service, which deals with sending the email. Mailer and templating are two of the services that are already registered with the service container by the framework.
In the services.xml file in the bundle's Resource/config directory, replace the commented out lines with the following, which changes the email addresses to something that can receive email:
<services> <service id="dotnet.listener.task_email" class="DotNet\TaskListBundle\Event\Listener\TaskEmailer"> <argument type="service" id="mailer"/> <argument type="service" id="templating"/> <argument>tasks@example.com</argument> <argument>rmiller@example.com</argument> <tag name="kernel.event_listener" event="task.updated" method="postUpdate" /> </service> </services> The service element has an id for the service. Tell it the class we want this service to be. Use the argument elements to inject in the mailer and templating services along with the email addresses.
The final thing is tagging the service as a listener for our task.updated event and specifying the method that listens to it. This method will now get called whenever the event is dispatched.
The last thing we need to do is add that template (src/DotNet/ TaskListBundle/Resources/views/Task/email.txt.twig) to render the email body:
The {{ task.name }} task was completed.
Now if you set a task to complete in the application you'll now receive an email notification.
For further ways to add functionality to your application, the documentation here is a great source of information about Symfony2.
Words: Richard Miller
This article originally appeared in .net magazine issue 239
Liked this? Read these!
- How to use the PHP command line
- 7 ways towards better APIs
- Improve your websites with microinteractions
- Our favourite web fonts - and they don't cost a penny
Any questions? Ask away in the comments!
A Picture Listing the Different Parts of a Computer
Source: https://www.creativebloq.com/web-design/build-your-own-task-list-manager-php-part-2-11135188
0 Response to "A Picture Listing the Different Parts of a Computer"
Post a Comment